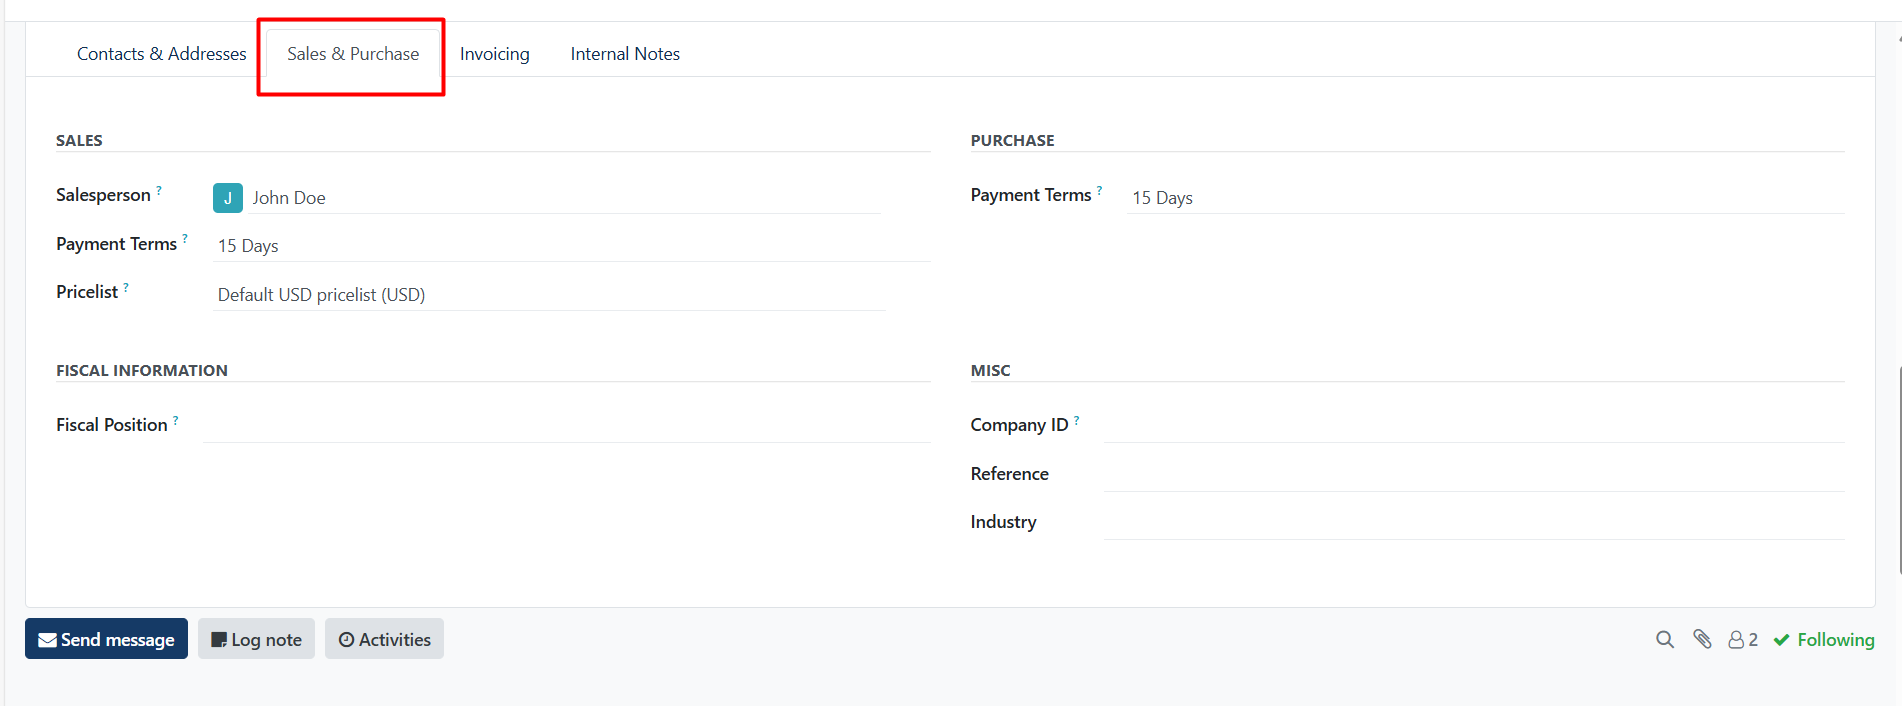
Click on Sales & Purchase Tab and then click on Add
The Sales & Purchases tab, which only appears when the Sales, Purchase, or Point of Sale applications are installed/activated.
The Fiscal Position can be set on the Sales & Purchases tab. Select a Fiscal Position from the drop-down menu.

Sales section:
Under the Sales heading, a specific Salesperson can be assigned to a Dealer. To do that, click the Salesperson drop-down field, and select one. Create a new Salesperson by typing the user’s name and making the appropriate selection.
Certain Payment Terms, or a certain Pricelist, can also be set, if needed. Click the drop-down menu next to Payment Terms and change it to one of the preselected Payment Terms, or Create a new one. Select the Pricelist drop-down menu to choose the appropriate Pricelist.
Click into the Delivery Method field to select an option from the drop-down menu.
Purchase section:
Specify Payment Terms and a preferred Payment Method here. A Receipt Reminder can be set here, as well.
Misc section:
Under the Misc. heading, use the Reference field to add any additional information for this dealer. If this dealer should only be accessible for one company in a multi-company database, select it from the Company field drop-down list. Select an Industry for this dealer from the drop-down menu.
